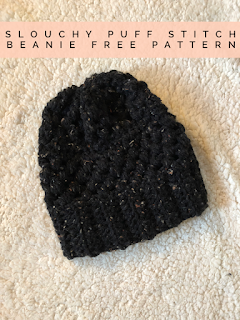
I didn't follow a pattern for this hat. I just kind of worked it up with no goal in mind but when I finished it, I loved it! So...I figured I would share it with y'all. It is super cute, super soft, and so warm. Probably one of my favorite beanies I've made so far. This one I made for my Mom. It works up pretty quick too as long as you are familiar with the puff stitch.
What you'll need:
- 2 skeins of whatever color you'd like to make your hat in. I made mine with Loops & Threads Charisma Tweed yarn in Black.
- A yarn needle
- scissors
- 9 mm crochet hook
Abbreviations:
- Chain (ch)
- Slip Stitch (sl st)
- Single Crochet (sc)
- Half Double Crochet (hdc)
- Skip (sk)
- Puff Stitch (ps)
- Back Loop (bl)
Instructions:
So we will start out with the band of the hat.
Ch 10
Row 1- Hdc in the 3rd ch from the hook and continue till you reach the end. (you'll end up with 9 hdc)
Row 2- ch 2, turn, hdc in bl of 1st stitch and continue till the end of the row.
-Repeat row 2 until you reach 24 rows total. Sl st the ends together to form the band.
Body:
Ch 1 and work sc all the way around the band. You will end up with around 40 stitches. If you end up with a different count, that is fine as long as the number is even.
Round 1- Ch 2, ps in 1st stitch in the round. ch 1. *sk. ps in next. ch 1*
repeat * to * in the round. When you reach the end, sl st to join.
Round 2-4- ch 2, ps in the ch stitch, ch 1, *sk, ps in next, ch 1*
repeat * to * in round. sl st to join.
Round 5-6- ch 2, hdc in 1st stitch and every stitch in the round. sl st to join.
Round 7- Ch 2, ps in 1st stitch in the round. ch 1. *sk. ps in next. ch 1*
repeat * to * in the round. When you reach the end, sl st to join.
Round 8-9- ch 2, ps in the ch stitch, ch 1, *sk, ps in next, ch 1*
repeat * to * in round. sl st to join.
Round 10- ch 2, hdc in ever stitch in the round. sl st to join.
Cut your tail to be about 18 in long. Use your yarn needle to feed the tail through every 3rd stitch. Pull as tight as you'd like to cinch the top together. Tie off and weave in the ends.
The picture I have at the top of this post is the hat before I cinched the top. Here is the finished hat! I hope you love the hat as much as do!


No comments:
Post a Comment